
How do I enable the floating wishlist badge?Updated 6 days ago
Floating wishlist badge FAQ
Q. How do I enable the floating wishlist badge?
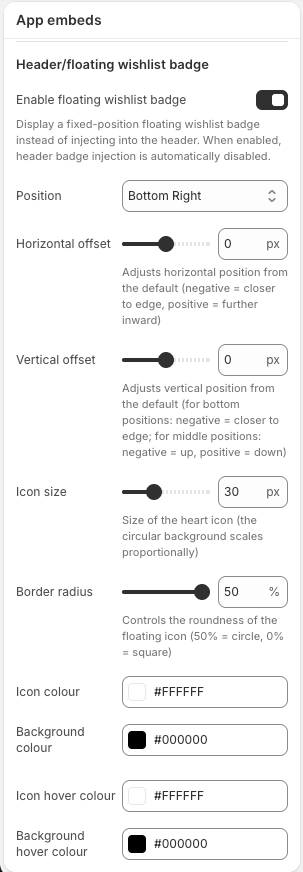
A. In Shopify, open your theme editor, go to the app embed section, and expand Wysh. Open Header/floating wishlist badge, then turn on Enable floating wishlist badge.
You can then choose a Position such as Bottom Right and adjust Horizontal offset and Vertical offset if needed.
Q. What happens when I turn it on?
A. Wysh shows a fixed-position wishlist button on the screen and automatically disables header badge injection. You do not need to use both at the same time.
Q. Why is this a good workaround when auto-injection is not supported?
A. If your theme is unknown or marked Partially Supported during Theme Configuration in the Setup Guide, the usual header badge placement may not be available or may require manual theme edits. The floating badge is a good workaround because it gives shoppers a clear wishlist shortcut without relying on header auto-injection or manual header code placement.
Q. When should I use the floating badge instead of manual header placement?
A. Use it when you want the fastest no-code option. Manual theme setup is still available through Manual theme icon placement, but the floating badge is usually simpler if you only need a visible wishlist entry point.
Q. What should I check after enabling it?
A. Preview your storefront and confirm the badge does not overlap with other fixed elements like chat widgets, cookie bars, or sticky mobile buttons. If needed, fine-tune the Position, Horizontal offset, and Vertical offset.
TIP
The floating badge is especially useful if you want a reliable wishlist shortcut while avoiding theme-specific header injection issues.